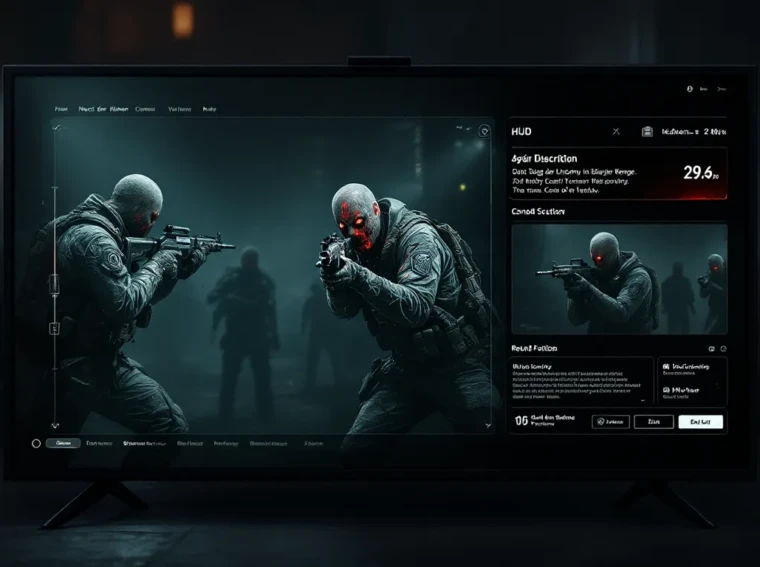
Call of Duty 2 Zombies remains a cult classic in the undead FPS arena, drawing both nostalgic veterans and curious newcomers into its brutal wave-based combat. Whether you’re grinding through Nacht der Untoten for the first time or pushing into the later rounds of Verrückt, understanding the fundamentals, weapon loadouts, perk strategies, map layouts, and team coordination, separates survivors from respawn screens. This guide pulls together everything you need to stay alive, rack up points, and dominate solo or with a squad across the game’s legendary arenas. If you’re serious about mastering Call of Duty 2 Zombies, read on.
Key Takeaways
- Call of Duty 2 Zombies is a wave-based survival mode where strategic resource management, perk prioritization, and map knowledge directly determine how deep you can push into the rounds.
- Master the points economy early by farming kills efficiently before round 5, prioritizing Juggernog as your first perk to double your health pool and survive longer.
- Weapon loadouts should balance reliable wall weapons with mystery box wonder weapons like the Ray Gun, reserving limited ammo for high-round desperation moments rather than wasting it early.
- Team coordination in co-op squads requires clear role assignment (Anchor, Trainer, Support, Wildcard), role-based communication, and established perk/power-up allocation to prevent panic deaths and cascade wipes.
- Learning fixed zombie spawn points and establishing training loops on each map—whether tight corridors on Nacht der Untoten or sprawling sections of Verrückt—lets you kite undead efficiently and control chaos in mid-to-late round progression.
What Is Call of Duty 2 Zombies?
Game Overview and Historical Context
Call of Duty 2 Zombies is the original incarnation of Treyarch’s wave-based survival mode, launching as part of Call of Duty: World at War’s DLC and later appearing in Black Ops compilations. Unlike campaign-focused Call of Duty titles, Zombies strips away single-player narrative and focuses players entirely on repelling endless undead waves. The mode became the foundation for Treyarch’s entire Zombies franchise, eventually spanning multiple Black Ops titles, Cold War, and beyond.
In this mode, you and up to three teammates spawn in a contained arena with minimal weapons and resources. Round by round, zombies spawn in increasing numbers and with escalating health pools. The goal is straightforward: survive as long as possible. The appeal lies in its blend of arcade-like fun and strategic depth. Casual players can hop in for a quick round and chase high scores, while competitive teams optimize every decision to push into the 50+ round territory.
Call of Duty 2 Zombies operates across platforms including PC and legacy console versions, though availability varies. The game uses a points-based economy that rewards both kills and map interaction, creating a feedback loop where smart play directly translates into better gear and perks. Understanding this economy is your first step toward mastery.
Core Gameplay Mechanics
Understanding Wave-Based Combat
Wave-based combat forms the backbone of Zombies gameplay. Each round begins with a set number of zombies spawning at predetermined locations. Kill them all, and the next round starts, with more zombies, higher health values, and increasingly aggressive behavior. Early rounds (1–5) spawn slow walkers: by round 15+, you’re facing sprinters that can tear through a squad in seconds.
There’s no timer forcing you to finish a round quickly, but slower play means more zombies accumulate on the map, increasing chaos and the chance of being overwhelmed. Most squads adopt a hybrid approach: methodical early game to build resources, then faster-paced action once they’re equipped. The spawning is not random, zombies emerge from fixed locations (windows, doorways, holes in walls). Learning spawn points for each map is critical to predicting threats.
Resource Management and Points System
Points are your lifeline. Every zombie kill awards points, with bonuses for headshots, knife attacks, and explosive damage. You spend points to buy weapons from walls, purchase ammunition from mystery boxes, and open doors (which unlock new map areas and better positions).
Early-game strategy often involves maximizing points before upgrading weapons. Some players deliberately shoot zombies in the limbs instead of killing them outright, keeping them alive longer to accumulate points before finishing them off. This is called “camping,” and it’s essential in early rounds but becomes dangerous in later waves.
Doors are expensive (typically 1,000+ points each) but necessary. Blocking off map sections reduces zombie paths and funnels undead into choke points where you can mow them down. Weapon purchases range from the pistol starting gun (costs zero) to higher-tier wall weapons that run 1,500+ points. The mystery box randomizes what gun you get for 950 points, sometimes a game-changer, sometimes a dud. Managing when to splurge on doors versus saving for better weapons separates skilled players from those who panic-buy everything.
Weapons, Perks, and Power-Ups
Essential Weapons and Load-Outs
Weapon choice defines your playstyle. Early-game staples include the M1928 Tommy Gun (wall-mounted, solid ammo capacity, good DPS) and the Kar98k rifle (mounted versions available on most maps, one-shot kills with precision aiming). As rounds progress and zombies toughen up, wall weapons alone won’t cut it, you’ll want mystery box drops.
The Ray Gun is the gold standard: a wonder weapon that one-shots zombies regardless of round, though ammo is limited. Other mystery box weapons like the Wunderwaffe DG-2 (chainable lightning damage) and Thundergun (knockback AoE) turn entire rounds in your favor. But, relying solely on wonder weapons is a crutch: balanced loadouts mixing hitscan weapons with splash damage perform better in squad play.
Here’s a practical early-to-mid game loadout philosophy:
- Primary weapon: Ray Gun or M1928 (reliable DPS)
- Secondary: Kar98k or sniper (precision for special moments, ammo conservation)
- Strategy: Don’t waste Ray Gun ammo on low-round zombies: reserve it for desperate situations or high-round pushes.
Perk Machines and Their Benefits
Perks are permanent upgrades that persist across rounds (until you’re downed). Each perk is tied to a specific machine scattered across the map, costing 500 points initially. Once purchased, all squad members, even those without the perk, gain benefits.
Juggernog is non-negotiable: it doubles your health pool, meaning you can take four zombie hits instead of two before going down. In competitive play, everyone buys this by round 2–3. Revive (or “Quick Revive”) lets teammates bring you back with minimal health loss, vital for squad cohesion. Speed Cola cuts reload times drastically, increasing DPS in tight situations. Double Tap boosts fire rate, making weapon pickups more lethal.
Early-round perk priority:
- Juggernog (first)
- Quick Revive (second, if playing co-op)
- Speed Cola (third)
- Double Tap (situational, based on your weapon choices)
Power-Ups and Special Items
Zombies drop power-ups after being killed. Nuke clears all zombies on the map instantly (risky: you lose points from kills). Insta-Kill grants one-shot kills for 30 seconds (use this to rack up massive point streaks). Double Points doubles your earned points temporarily (pair with high-kill windows for rapid cash accumulation). Max Ammo tops off all weapons (critical when running dry mid-round).
Power-up spawning isn’t random, certain kills (like from the mystery box or specific weapon drops) have higher chances to trigger drops. In co-op, squads often coordinate who grabs power-ups based on need: the player low on ammo prioritizes Max Ammo: whoever’s down gets Revive access.
There’s also the Power Cube and other map-specific pickups that boost melee damage or unlock hidden paths. Learning which power-ups appear where and when to prioritize them over weapons separates casual players from optimizers.
Master the Maps: Strategies for Every Arena
Nacht der Untoten Map Guide
Nacht der Untoten (“Night of the Undead”) is the OG, the map that started it all. It’s a compact military facility with tight corridors, making early rounds feel cramped but manageable. The map is roughly T-shaped: the spawn room leads to a main hall with side corridors branching off.
Key locations:
- Spawn room: Starting point with a basic pistol. Exit quickly to avoid getting trapped.
- Window spawn zones: Three windows (left, right, back) are entry points for zombies. Board them initially to buy time.
- Mystery box location: Moves each round, but typically in the main corridor or side rooms.
- Power area: Activate the map’s power switch to unlock doors and perk machines: costs 1,000 points initially.
Early-round strategy: Camp near the power switch area. Board windows, farm points off zombies crawling through, then push to unlock doors leading to better weapon areas. The Kar98k on the wall near the power room is invaluable. By round 5–6, you should have Juggernog, a decent wall weapon, and knowledge of all four corners of the map.
Late-game tactics: Nacht becomes a “training” map, players loop zombies in large circles, kiting them while shooting to maximize kill streaks. The main corridor loop is ideal for this, especially with squad covering different angles.
Verrückt Map Tactics
Verrückt (“Insane”) is a massive psychiatric facility with multiple floors, wing sections, and trap mechanisms. It’s significantly larger than Nacht, offering more flexibility but also more complexity. Zombie spawns are spread across multiple entry points, and the map favors coordinated team play.
Key features:
- Two main floors: Upper and lower sections connected by stairs and elevators.
- Trap system: Electric traps and exploding barriers that cost points to activate and damage all zombies in range. These are powerful but expensive.
- Multiple perk locations: Juggernog, Quick Revive, Speed Cola are spread across wings.
Beginner approach: Stick to one wing (usually the starting area and adjacent section). Open doors methodically, grab perks, and camp in a defensible room with limited zombie entry points. This “campground” strategy lets new players learn spawn patterns without getting overwhelmed.
Advanced squads: Use the trap system to clear high-round waves instantly. Position players to cover multiple entry points, rotate through perk machines to keep everyone buffed, and use the map’s openness to split zombie attention across the squad. The upper floor offers sniper sightlines: the lower floor has tighter choke points. Mixing floor positions maximizes coverage.
Shi No Numa and Other Classic Arenas
Shi No Numa (“Swamp of Death”) introduces a jungle setting with fog, temple structures, and narrower passages than Verrückt. It’s more methodical, you can’t just run circles like on Nacht. Zombie spawns are delayed initially due to the fog mechanics, giving you extra setup time early.
Unique mechanics:
- Fog: Reduces visibility but doesn’t affect gameplay: more atmospheric than functional.
- Teleportation pads: Located around the map, they let you jump between areas instantly (useful for escaping ambushes).
- Power-up frequency: Higher than other maps: zombies drop powerups more often.
Strategy: Early rounds are about unlocking the middle temple area where better weapons and perks cluster. The map’s branching paths mean you can set up multiple “training” loops. Unlike Nacht (tight) or Verrückt (open), Shi No Numa rewards players who learn both aggressive and defensive positioning.
Advanced Survival Tips and Strategies
Early Round Optimization
Rounds 1–5 are your foundation. Mistakes here snowball into game-ending chaos later. The key is maximizing points while minimizing risk. Many skilled players deliberately avoid killing all zombies immediately, they’ll shoot a zombie twice with the pistol (80 points per shot, 160 total per zombie) rather than headshot it (160 points immediately). The difference is time: slower kills mean more zombies stay alive longer, allowing you to farm the entire round instead of waiting for respawns.
Once you’ve accumulated 3,000–5,000 points, spend it: buy the first door (usually 1,000), grab the wall weapon, then a perk if available. By round 3, Juggernog should be purchased by at least two squad members. This early investment directly scales your survival odds.
Don’t camp the mystery box early. The Ray Gun is tempting, but it’s a late-game asset. Early rounds? Wall weapons are more reliable and don’t waste limited ammo.
Mid to Late-Game Progression
Rounds 10–25 are where skill separation happens. Zombies now have 3–4x the health of early rounds, and they move faster. Wonder weapons become relevant, but so does positioning and resource management.
By round 10, your squad should have:
- All players with Juggernog
- At least two wall weapons upgraded (if possible)
- Wonder weapon from the mystery box (prioritize Ray Gun or Wunderwaffe)
- Clear map knowledge and established training routes
Resource management shifts: ammunition becomes precious. A single Ray Gun magazine is all you get in some rounds, waste it, and you’re screwed. Many high-level players switch to wall weapons with infinite ammo (purchased magazine refills) and reserve wonder weapons for specific high-zombie moments. This balance between DPS and sustainability is the meta.
Training strategy: Establish a loop, usually a corridor or open area, where your squad can kite zombies. One player “trains” (runs in circles, drawing zombies), while others shoot from safe positions. This concentrates zombie aggression and allows coordinated gunfire. Training breaks down in very late rounds (35+) when zombie speed exceeds human sprint capability.
Zombie Spawning Patterns and Predictions
Zombie spawns aren’t random. Each map has fixed spawn points, and the game alternates between them. Learning these patterns lets you predict where threats emerge and position accordingly. For instance, on Nacht, zombies spawn from three windows in a predictable cycle. After the third spawn wave from the left window, they’ll come from the right. Knowing this, you position a player to cover the right window preemptively.
Spawn rates also scale with round and squad size. Four-player squads spawn more zombies per round than solo games, the game adjusts difficulty dynamically. Early rounds feel manageable because the game limits concurrent zombies on the map. By round 15+, the cap is gone: all spawned zombies from that round exist simultaneously, creating genuinely chaotic situations.
Advanced players exploit spawn timing by “setting up.” They’ll herd zombies into a loop, then stand still for 10–15 seconds while the game pauses spawning. This lets them reload, regain stamina, and reset their position. Once they resume moving, spawns resume.
On maps with multiple spawn zones (Verrückt, Shi No Numa), squad positioning is critical. If three players camp one area, spawns will overload that zone. Spread out, and you distribute zombie aggression. This is why experienced squads rarely bunch up, it turns rounds into impossible bottlenecks.
Team Play and Multiplayer Tactics
Cooperative Strategies for Squad Success
Solo Zombies is one beast: co-op is another entirely. With four players, zombie counts scale dramatically. A round that spawns 12 zombies solo might spawn 40+ in a full squad. This isn’t just harder, it’s qualitatively different. Lone-wolf tactics don’t work.
Successful squads assign roles. One player becomes the “anchor”, they camp a defensible position (narrow corridor, elevated platform) and hold the line. The other three rotate: one trains zombies to the anchor’s position, another covers flanks, and the third grabs perks or mystery box drops. This division of labor prevents friendly fire chaos and ensures someone’s always in position to handle threats.
Resource sharing is critical. If one player has a Ray Gun and another has 500 ammo, the Ray Gun holder should prioritize high-threat moments while the other conserves shots. If someone’s low on health, others prioritize grabbing Max Ammo or Revive pickups for them. This isn’t altruism, it’s survival math. A downed player drains revive-capable teammates and becomes a liability.
Establishing squads also means having a leader. This person calls out spawns (“Zombies coming from the left window.”), manages perk purchases (“Sarah, grab Quick Revive next round”), and makes abort-round decisions. Clear communication and leadership prevent panic-buying and random deaths.
Communication and Role Assignment
Quick communication separates pub matches from organized squads. Use callouts: “Train left,” “Swapping to pistol,” “Revive me,” “Running to mystery box.” This takes seconds and prevents tragic miscommunications.
Role assignment should happen before round 1:
- Anchor/Defender: Best under pressure, camps a position, holds zombie waves.
- Trainer: Most mobile, comfortable kiting zombies, directs aggression.
- Support: Flexible positioning, prioritizes teammates over kills, manages perks and pickups.
- Wildcard: Roams for mystery box opportunities, covers unexpected threats.
Roles can rotate each game, but consistency helps. If you always anchor, you optimize that position’s weapon and perk choices. If you always train, you learn the best loops.
Resource allocation should also be clear:
- Who buys Juggernog first?
- Who prioritizes mystery box access?
- Who grabs power-ups if multiple drop?
Teams that pre-decide these questions move faster and survive longer. Teams that argue mid-round about who gets the max ammo inevitably lose someone to a sloppy death.
Revisit strategies from Ultimate 10 Call of Duty Strategies for broader competitive frameworks that apply to squad-based Zombies. Also, many of the building mechanics in Discover the Exciting World share similarities with resource management in Zombies, planning ahead and allocating assets efficiently are universal Call of Duty principles.
Common Mistakes and How to Avoid Them
Beginner Pitfalls and Quick Fixes
Mystery box obsession: New players burn 5,000+ points chasing the Ray Gun in early rounds. Fix: Ignore the box until round 5+. Wall weapons are cheaper, more reliable, and you’ll have perks that make them viable through round 10.
Skipping doors: Locked doors feel punishing because they cost points. But opening two doors by round 3 doesn’t slow your progression, it accelerates it. More map = more spawn area = better zombie distribution = longer training loops. Fix: Budget door costs. Expect 3,000 points for doors, 2,500 for perks, 1,500 for weapon purchases by round 5.
Forgetting about ammunition: Picking up an amazing wall weapon is worthless if you’re out of ammo by round 6. Fix: Check ammo reserves before entering high-round zones. When in doubt, grab Max Ammo power-ups even if you don’t immediately need them.
Hogging perks: In co-op, one player taking all four perk machines while teammates wait is game-losing. Fix: Establish perk order. All players grab Juggernog, then rotate who gets Quick Revive, Speed Cola, and Double Tap based on roles and weapons.
Panic knifing: Zombies are slow early, you can knife them. By round 3, knifing costs health you don’t have. Fix: Once zombies out-pace your melee, switch to guns. Knifing should be emergencies only (low ammo, surrounded, teammate covering).
Why Your Team Might Be Losing
If your squad consistently dies by round 10–12, diagnose the issue:
Spawn overload: Your team isn’t spreading map presence. Zombies all funnel to one room, and nobody can handle the volume. Fix: Rotate positions. Have one player in each major area so spawns distribute evenly.
Bad weapon economy: Spending 2,000 points on a wall weapon in round 2 instead of saving for perks leaves you defenseless. Fix: Prioritize Juggernog above all. Once everyone’s tanky, then worry about DPS upgrades.
No communication: Someone spends mystery box ammo without telling the team: now you’re cornered without a Ray Gun. Fix: Simple: “I’m using Ray Gun on this wave” or “Save that gun for next round.” Literally five seconds of speech prevents round-ending mistakes.
Revive cascades: One death leads to two, then three, then a wipe. This happens because reviving somebody mid-round exposes the rescuer to the very threats that killed the first player. Fix: Don’t revive mid-round unless the downed player is in a safe position or you’re in an early round where zombies are slow. Sometimes leaving someone down is the strategic play, revive after the round ends if you’re strong enough.
Training in wrong locations: You pick a loop that’s too open or has multiple zombie spawns you can’t control. Fix: Practice map routes solo first. Learn which corridors let you kite indefinitely without blind corners. Test your loop solo on round 10+ before relying on it in co-op.
Looking at competitive breakdowns, Game8 and The Loadout both have detailed Zombies guides that cover meta shifts and high-round strategies worth cross-referencing if you’re pushing past round 20.
Conclusion
Mastering Call of Duty 2 Zombies isn’t about memorizing every spawn point or grinding 100 solo games, though those help. It’s about understanding the economy of points and ammo, reading zombie behavior, and communicating clearly with your squad. Start with fundamentals: buy Juggernog, learn one map’s layout, grab a reliable wall weapon. Then layer in complexity: establish training routes, optimize perk rotations, coordinate squad roles.
The game rewards precision and patience. Panic spending points, aggressive wonder weapon usage, and solo mentality in co-op will kill you. But deliberate positioning, resource conservation, and team synergy unlock rounds you didn’t think possible. Whether you’re chasing a round-50 personal best or just trying to hang with friends for a few hours, the core principles remain: survive longer by playing smarter. Hit the maps, learn from mistakes, and remember, one mistake at round 20 is often unrecoverable, so the real skill is avoiding them in the first place. Good luck out there, and may your Ray Gun never run dry.